
The Dog Tale is reader-supported. We may earn a commission if you buy something through our site; this doesn’t change our recommendations.
If people at the dog park are starting to confuse your little Yorkie for a remarkably active mop, it’s time to think about doing some Yorkie grooming. Given their tiny size and unique coat, Yorkshire Terrier grooming is an art in and of itself. With near non-existent shedding and very fine hair, the Yorkie coat takes a bit of extra care to keep it looking beautiful.
With a generally high level of curiosity, a tendency to have dental woes, and more than their share of allergies, grooming a Yorkie at home is an important part of living with this crazy, lovable little breed.
You should plan on grooming a Yorkie on a weekly basis. Some steps will be less frequent and others more, but regular grooming is key to preventing frustrating complications down the line.
In this guide:
- Before you begin: Yorkie grooming tools
- Keeping that Yorkie coat manageable: It’s all about the brush
- Keep those Yorkie ears and eyes clean
- Unwanted company: checking a Yorkie for fleas and ticks
- Splish splash, time for a Yorkie bath
- Handsome haircuts: How do you groom a Yorkie at home?
- Smile! Tooth brushing 101: Keeping Yorkie teeth healthy
- Clipping Yorkie nails and keeping those paws healthy
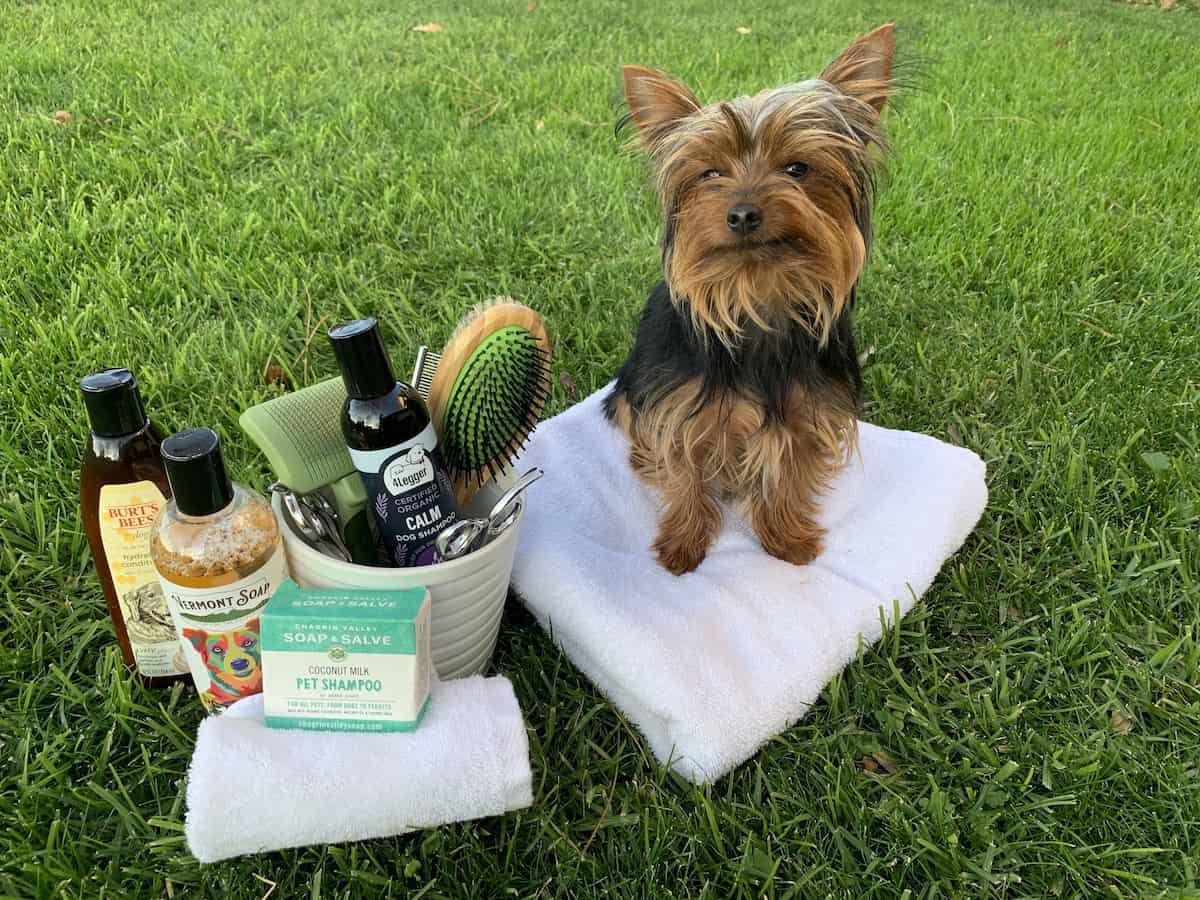
Before you begin: Yorkie grooming tools
Before getting started, you’re going to need a few important items to properly groom your little Yorkshire Terrier:
| You’ll need: | Our picks: |
|---|---|
| Pin & bristle brush | HaloVa Double-Sided Pin & Bristle Bamboo Brush for Dogs |
| Slicker brush | Hertzko Self-Cleaning Slicker Brush |
| Cotton balls | Perfect Stix Cotton Balls (any brand will do) |
| Ear cleaning solution | Eco Ears Natural Dog Ear Cleaner |
| Dog eye wipes | Petpost Tear Stain Remover Wipes |
| High-quality dog shampoo | 4-Legger All Natural Lavender Dog Shampoo |
| Electric clippers | Wahl Pro Series Complete Pet Clipper Kit |
| Dog toothbrush and toothpaste | Pura Naturals Pet Organic Dental Solutions Kit |
| Scissor-style Dog nail clippers | Boshel Dog Nail Clippers |
| Styptic powder | Nutri-Vet Styptic Powder |
| Your pup’s favorite treats | Greenies Original Teenie Natural Dental Dog Treats (5-15 lb. dogs) |
Keeping that Yorkie coat manageable: It’s all about the brush
Brushing a Yorkie is an art unto itself, due to the Yorkshire Terrier’s unique hair-like coat.
Make sure you start with a pin and bristle brush, gently brushing out any tangles and snags. It needs to be stressed: go easy here…Yorkie hair is thin and can easily knot and tangle. If you go at it like Rapunzel’s hairdresser, the event can end up traumatizing your pup. So take it slow and brush those tangles out gently.
Next, use a slicker brush to carefully remove any dead hair and remaining tangles in your dog’s coat. The slicker brush thoroughly lifts and separates the hairs of the coat, so work slowly to prevent too much pulling. At the end of the brushing session, your pup’s coat should be free of debris, knots and any matting.
If you’re not sure what tools or tactics to use, our guide to the best brush for Yorkies explains it all in more detail.
- Protect your pet in seconds
- Accident & Illness + Optional Wellness coverage available
- Policies start at just $9.99/mo
Keep those ears and eyes clean
Next, it’s time to give those puppy dog eyes and ears some attention. You should exercise caution here, and if you are unsure of any steps, consult your vet first.
Cleaning the ears
When it comes to the ears, less is more. Most of the time, you’ll simply need to wipe your dog’s outer ear flap to keep them free from visible debris. Vet-approved ear wipes make this easy, and you can simply add the process to your bath time routine. However, if you notice a substantial amount of gunk and debris in your Yorkie’s ear canal, they may need a more thorough cleaning. This will require a liquid cleaner and caution to avoid damaging your dog’s eardrums or causing infection. We walk you through the full process in our guide to cleaning Yorkie ears.
Cleaning Yorkie eyes
Your pup may develop tear stains, which are a dark buildup of gunk left by a discharge of the eyes. This discharge could be due to a reaction your dog is having, such as seasonal Yorkie allergies, or a sensitivity to something such as the shampoo you’re using. Or it could just be the natural result of your dog’s tears.
Treating these stains isn’t too difficult—it just requires care. The best way to do it is to regularly wipe your dog’s eyes clean with a damp cloth during bath time and a good dog eye wipe in-between baths. Preventing the stain from setting in the first place is key.
Your dog probably won’t love you getting so close to their eyes, though, so you need to make sure you’re comforting and calm throughout the whole process. Our guide to cleaning Yorkie tear stains will walk you through the process.
>> Read more: How to Make Your Own Homemade Dog Eye Wipes
Unwanted company: checking a Yorkie for fleas and ticks
An unfortunate reality of being a pet parent is the stowaways they sometimes bring home. Fleas and ticks are external parasites that dogs are particularly susceptible to picking up. You want to check your dog for these pests frequently; they are not only irritating to your pup, but can carry some pretty serious diseases as well.
How to check a Yorkie for fleas and ticks
To find pests on your dog, you have to be a bit of a detective. One of the first things to do is to simply check the areas where fleas and ticks like to hang out. This can be anywhere on your dog’s body, but fleas and ticks especially love to spend time in the groin and armpits (the joint where the body and front legs join).
To check your pup, flip them on their back and look closely at the armpits and groin. Fleas are a very dark reddish-brown and are ⅛ of an inch (about 3 millimeters) in length. Their bodies are flat and long, and can be difficult to spot, especially due to how fast and how far they can jump—up to twelve inches!
Ticks tend to be a bit larger, slower, and easier to spot. However, the Blacklegged Deer tick can be less than ⅛ of an inch or smaller and much more difficult to spot.
For every adult tick or flea spotted, there are likely others nearby. So take any sightings very seriously and check your entire dog thoroughly.
The paper towel trick
When it comes to fleas, even if you are unable to physically spot any of these pests, you may at least be able to find evidence of them. For example, you may identify flea poo, which is sometimes called “flea dirt,” using the paper towel trick.
To do this, lay out several sections of a white paper towel and place your pup on top. Next, brush through their coat using a fine-toothed flea comb, especially around the groin, tailbase, armpits, and legs. Brush as closely to the skin as possible, and as you do watch for any black debris falling onto the white paper towels. It will likely resemble finely ground black pepper.
While this could just be a sign that your pupper needs a bath, you can tell if it is flea feces by slightly dampening the black stuff and rubbing it into the paper towel. If it takes on a red tint, that’s an indication it contains blood (gross!) and is probably confirmation that your little buddy has a flea problem.
Once you have identified any pests, it’s time to go Terminator on them, because no one wants those houseguests—least of all your pup.
Removing fleas
Flea removal can be a bit tricky. First, you will need to decide if you will treat your dog with a chemical-based or more natural flea treatment.
Additionally, you will need to treat your pup’s bed, blankets toys and possibly even portions of your home to prevent re-infestation. You will also want to come up with a plan for ongoing preventative treatment that balances your dog’s health with keeping the unwanted critters away.
The good news is, there are many options on the market, and if you are unsure after doing some research, having a conversation with your vet is always a great place to start.
Removing ticks
If you find an unattached tick on your dog, simply take a piece of sticky tape (packing tape works great) fold the tick into the sticky side and flush away or dispose of it in an outdoor garbage can.
For attached ticks, use fine-tipped tweezers and grasp the ticks head as closely to your dog’s skin as possible, without actually pinching your pup. Gently and very slowly pull the tick straight out (perpendicular) from your dog’s skin, trying not to sever the ticks body.
The goal is to pull the entire tick head out of the attachment point, which will help avoid infections after removal.
If any ticks you find look like a Deer tick, you may want to save it in a sealed plastic sandwich baggie for inspection by your vet. Deer ticks are notorious carriers of Lyme disease, which can be debilitating and even fatal in dogs.
Splish splash, time for a Yorkie bath
After you’ve checked your pup for passengers, it’s time to get them clean. Yorkies are notoriously sensitive to cold and heat, so be careful to use slightly warmer than room temperature water and always test the water temperature on your inner wrist or forearm first.
Yorkies also tend to have delicate skin so be sure to use a good Yorkie shampoo that is balanced for dog pH levels. Avoid any shampoos that contain lots of extra chemicals or fragrances.
Bath frequency is also a consideration, and overdoing it can cause dry, irritated skin for your pup. You are usually safe to give your pup baths every two to three weeks, but space them out a bit more if you notice your Yorkie has irritated or dry skin.
There are plenty of things to remember when bathing your pup, but don’t sweat the details: our handy bathtime guide will walk you through all the sudsy steps of Yorkie bathing
Handsome haircuts: How do you groom a Yorkie at home?
Yorkie coats are beautiful when cared for properly, but care for them you must. Part of that care includes regular hair cutting to keep the coat looking great.
Most people pick their favorite Yorkie haircut and run their pooch to a trusted groomer. The more adventurous among us, however, may go the DIY route and give their pup an at-home haircut.
>> Read more: Best Dog Clippers for Yorkies
There is quite a bit of variety when it comes to Yorkie haircuts. If you’re new to DIY dog trimming, think about picking a hairstyle that is a little more straightforward. It has been my experience that a Yorkie with short hair makes for a happy pup and a happy owner. Our awesome Yorkie puppy cut guide can help you get there. Your pup will thank you later.
Between full-blown haircuts, be sure to practice good maintenance trimming. Grooming a Yorkie’s face and head with regular trimming is important to keep their hair from irritating the eyes and ears. Quick trims around the paw pads and sanitary areas will keep the rest of your dog clean and irritation-free as well.
>> Read more: Can You Use Human Clippers on Dogs?
Smile! Tooth brushing 101: Keeping Yorkie teeth healthy
One of the most neglected aspects of dog grooming is the teeth. This is bad for any dog, but especially bad for little breeds like the Yorkie, which tends to struggle with dental issues more frequently.
Consider making daily brushings a regular part of caring for your dog. Brushing Yorkie teeth doesn’t need to take long and can be a painless process, especially when it becomes routine for you and your dog.
Start good brushing habits when your dog is a puppy, if possible, and introduce tooth brushing slowly. If your dog hates the process, try using a tasty dog toothpaste that will keep them interested. And, above all, make it a praise-soaked event to help future brushings go more smoothly.
Between brushings, use dental-friendly Yorkie treats to help maintain clean teen and fresh breath. Greenies, Whimzees, and Blue Buffalo Dental Bones are a few great options.
Clipping Yorkie nails and keeping those paws healthy
Healthy paws make for healthy dogs. A pup with paw injuries or nail issues will be less active. This leads to unhealthy, bored, and overweight dogs that are in for a lifetime of health problems.
Yorkie nail clipping
Active dogs who do a lot of walking and running tend to wear down their nails naturally and need less help from their humans when it comes to clipping nails. Small breeds like Yorkies, however, often don’t put in the miles required to keep those nails short, so regular clipping may be necessary.
Depending on how active your dog is, nail trimming can usually be done every three to four weeks. If you’re unsure, ask your vet about the ideal length of your dog’s nails next time you are in for a visit.
You can often identify nails that are ready for a trim by the telltale “clickety clack” sound they make as your dog walks over a hard surface. This is a pretty good indication that your pup’s nails are curving too far down and need to be trimmed.
How to clip a Yorkie’s nails
Dog nail trimming can be tricky, so if it is your first time, go slowly and err on the conservative side. Clipping your dog’s nails too short will hit the nail pulp, or “quick,” which contains nerves and blood vessels, resulting in pain and trauma for both you and your pup.
To trim the nails you’ll need a good pair of scissor-style canine nail trimmers and a steady hand. Always trim with the clippers nearly parallel to the nail and only take off enough to expose the chalky white ring on the interior end of the nail, indicating that you’ve gone far enough.
A handy trick when trimming canine nails it to use a bright pen light behind the nail. The translucence of the nail often shows how far up the nail the quick starts, so you can give it plenty of margin.
If you do accidentally cut the nail too short and hit the quick, stay calm and focus on stopping the bleeding and keeping your dog comfortable. Keep a small dish of corn starch mixed with styptic powder nearby and gently pack the injured nail into it to help staunch the bleeding.
Cutting the quick is painful for your dog, but not life threatening, so don’t panic. Give your pup a quick treat to help calm them and focus their attention elsewhere. But no treat for you, Edward Scissorhands…be more careful next time, ok?
Paw Debris
While you’re working on the paws, check for debris, thorny stickers, or other things caught in the hair between the pads.
Where I live, during the fall season local plants produce little thorny seed pods that are constantly getting stuck in Max’s paw pads. These painful passengers can cause a lot of discomfort, so make sure your pup hasn’t picked up anything irritating on your latest walk.
Finally, a treat is in order!
Your pup has been poked and prodded enough at this point, time to reward that patient Yorkie with lots of attention and their favorite healthy treat!
